Install or Upgrade the Master Calendar Email Notification Service
The EMS Master Calendar Email Notification Service must be installed on a computer that is connected to the network and is running 24 hours a day, often the database server.
Install the EMS Master Calendar Email Notification Service on one computer only, typically installed on a machine that is continuously running.
Existing versions of the EMS Master Calendar Email Notification Service must be manually uninstalled through the Add or Remove Programs menu.
- Download the DeaMasterCalendarEmailNotificationSetup.msi onto the server that will be running the service.
-
Double-click DeaMasterCalendarEmailNotificationSetup.msi and follow the on-screen prompts. We recommend that you accept the defaults.
-
In the Microsoft Windows Start menu, locate EMS Master Calendar Email Notification Configuration Service > Email Notification Configuration Settings.
The EMS Master Calendar Email Notification screen opens.
-
Enter a valid SMTP Server name or IP address that the Email Notification Service can use to send notification emails.

- Configure the following:
- Send From – An active email address that will be displayed in the From Field of the notification emails that are sent out.
- Master Calendar URL – Enter in the Master Calendar URL.
- Interval – Determines how frequently emails are to be sent out.
-
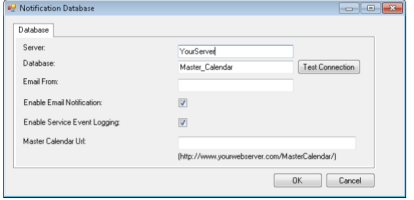
Edit the Server and Database names to reflect the Server and Master Calendar database names.
- Click the Test Connection button to verify a successful connection.
- Select whether Event Logging should be enabled.
- Click OK to save the settings.
If you encounter issues starting the service, visit the Knowledge Base available in